

Custom Sanding Sheets: How to Choose the Right Grit and Backing for Your Project
2026-10-31
Ask any finisher what ruins a Saturday afternoon, and they'll likely mention sanding sheets that clog, tear, or refuse to bend around a curve. The fix isn't more elbow grease—it's matching the grit and backing to the actual demands of your project. That's where custom sanding sheets come in, and why SHENZHEN SUN ABRASIVES focuses on options you won't find on a big-box shelf. Below, we break down what to look for so your next finish feels effortless.
Match the Grit to the Task, Not Just the Number
Grit numbers are often treated like a one-size-fits-all shortcut, but real sanding work demands more nuance. The same 120-grit paper can feel like a heavy-duty scrubber on soft pine or a gentle polisher on hardened maple. Before reaching for a sheet, consider what the surface actually needs: are you removing old varnish, smoothing a rough patch, or prepping for a final coat? Matching the grit to the material and the goal will save you from endless rework.
Think of grit not as a strict ranking but as a tool tuned to the job. For stripping paint or flattening a warped board, a coarse 60 or 80 grit works fast, but if you use it on a thin veneer, you risk burning through. By contrast, 220 grit might feel useless on a deep scratch, yet it is perfect for knocking down dust nibs between coats of finish. The real skill is reading the surface feedback: if the paper clogs in seconds, move up a grit; if it glides without biting, step down.
Experienced finishers often keep three or four grits within arm’s reach and switch mid-task as the surface changes. That is the difference between sanding by the number and sanding with intent. Next time you pick up a sheet, ask what the wood is telling you rather than what the label says. The right grit is the one that removes just enough material without leaving behind new problems.
Backing Material Decides How Long Your Sheet Survives
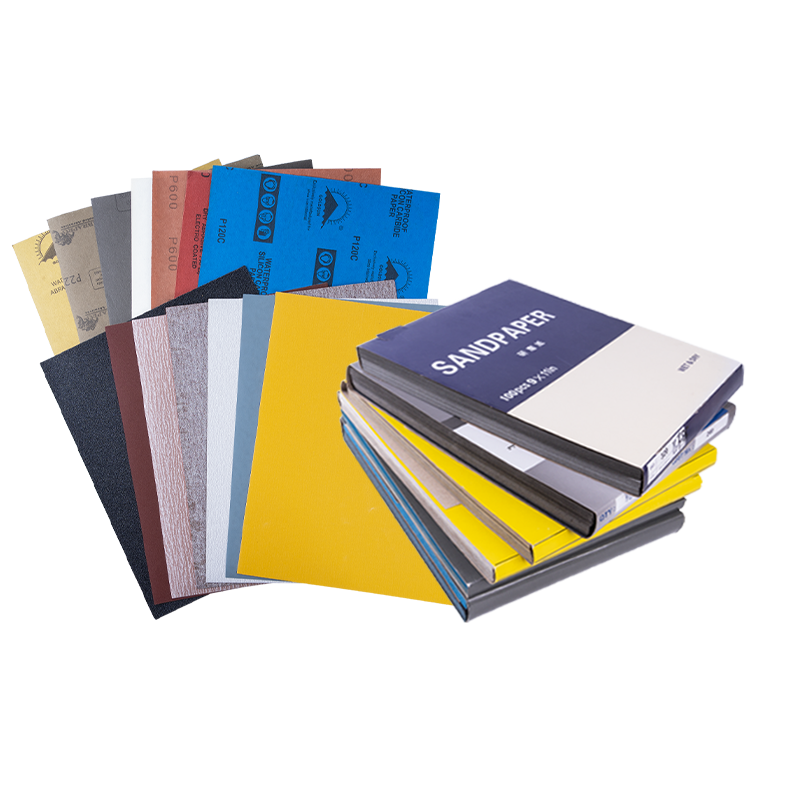
The backing is where most failures begin, yet it rarely gets the attention it deserves. A flimsy paper base will buckle after a few humidity swings, while a dense, resin-bonded layer holds its shape through years of rough handling. If you skip straight to surface durability and ignore what sits underneath, you are setting yourself up for early tears along the edges.
Flexible foam backings feel comfortable underfoot but often sacrifice longevity for that softness. They break down faster under heavy traffic, losing their grip and allowing the top layer to shift. For high-use areas, a firmer woven or felted substrate usually makes more sense because it resists delamination and keeps the sheet lying flat instead of curling at the corners.
Moisture is the real test. Cheap backings soak up spills and harbor mold, turning a minor accident into a permanent stain beneath the surface. A closed-cell or rubberized backing sheds liquid instead of absorbing it, which means your sheet can survive a flooded utility room without warping. Match the backing to the environment, not just the price tag, and the whole product will outlast expectations.
Why Custom Sizes Beat Off-the-Shelf Sandpaper
When you grab a standard sheet from the hardware store, you usually end up folding, trimming, or wrestling it onto a sanding block that was never meant to fit. Custom-cut sandpaper skips all that guesswork. Each piece arrives sized to your exact tool or surface, so you spend less time prepping and more time actually smoothing wood, metal, or drywall.
Off-the-shelf packs force you into a one-size-fits-all mindset, but real projects rarely work that way. A narrow corner, a curved handrail, or an odd-sized orbital sander pad can turn a simple job into a series of awkward cuts and wasted strips. Custom sizes let you order precisely what the task demands, whether that's a 3-inch disc for a palm sander or a long narrow strip for edge work.
There's also the hidden cost of standard sheets: you often buy a whole pack just to use a fraction, and the leftovers sit around gathering dust or get tossed. With custom dimensions, every sheet has a purpose from day one. It’s not about being fancy—it just means the sandpaper actually fits, which keeps your strokes even and your finish clean.
The Hidden Cost of Choosing the Wrong Grit
Most people assume any sandpaper will eventually get the surface smooth if they just keep rubbing. That assumption quietly eats away at both your time and your workpiece. The wrong grit doesn't just slow you down — it changes the entire outcome before you even notice something is off.
Grab something too coarse and you'll watch deep scratches appear almost immediately. You sand them down with a finer grit, then discover the surface is now uneven because too much material came off in one spot. What should have been a quick pass becomes a cycle of repair, and each round removes more wood than intended.
On the flip side, a grit that's too fine clogs within seconds and stops cutting. You press harder, the paper glazes over, and the heat starts to burnish the surface until it repels stain or finish. The real cost shows up later — blotchy patches, wasted abrasives, and a project that needs to be stripped back to raw wood. The sandpaper itself was cheap. The rework isn't.
Paper, Film, or Cloth? A Quick Backing Breakdown
Paper backing offers a stiff, flat surface that cuts aggressively and leaves a consistent scratch pattern. It’s the go-to for hand sanding and fine finishing where you don’t need the backing to flex or survive moisture. The trade-off is durability: fold it, soak it, or push too hard on an edge and it tears without much protest.
Film backing sits somewhere between paper and cloth. It’s thinner and more uniform than paper, which helps when you’re chasing tight tolerances or working on contoured surfaces. Film also shrugs off water and repeated bending better than paper, so it shows up a lot in wet sanding and high-grit automotive work.
Cloth backing is the heavy-duty option. It can take repeated flexing, tearing, and rough handling, which makes it the default for belt sanding, coarse stock removal, and jobs that punish the abrasive. The added toughness comes with a slight loss in flatness and precision, but when the material fights back, cloth keeps going long after paper gives up.
Test Your Finish Before You Commit to a Full Batch
A finish can look completely different on a scrap piece than it does on your actual project. Before you mix up a large batch or spray an entire run, take a small offcut or a hidden test panel and apply the exact same steps you plan to use on the final pieces. Watch how the finish levels out, how it builds on edges, and whether it changes color as it dries.
Small-batch testing also catches problems that are easy to miss in your head but obvious once they’re in front of you. You might discover that a particular sealant reacts with the stain underneath, or that the sheen is too glossy for the surrounding surfaces. Fixing these issues on a test strip costs a few minutes; discovering them after you’ve coated fifty parts means sanding, stripping, or starting over.
Once the test piece looks right, reproduce the same conditions for the full batch. Use the same mixing ratio, the same application tool, the same drying environment. If anything in the final run has to change, go back to another small test before scaling up again. That extra step prevents the kind of batch-wide mistakes that are expensive to undo.
FAQ
Open-coat means the abrasive grains cover about 50-70% of the surface, leaving gaps that let sawdust and debris clear out. That makes it the better choice for softwoods, resinous woods, or any surface that clogs paper quickly. Closed-coat packs the grains tightly for a more aggressive cut on hard, dense materials, but it loads up faster if you're sanding something sticky or gummy.
Film backing is waterproof and much harder to tear, so it survives wet sanding and edge work where paper would rip. If you're doing auto body work, sanding between coats of finish, or shaping a curved edge, switch to film. Paper is cheaper and fine for flat wood or drywall, but it wears out quickly on sharp corners or when it gets wet.
Start with 60 or 80 grit on a drum or orbital sander to cut through the old finish without digging too deep into the wood. If the varnish is thick or has heavy build-up, you can drop to 40 grit, but move slowly and check often because that coarse grit leaves deep scratches that are hard to remove later.
No, that will leave visible scratches under the final finish. You need the intermediate steps, usually 80 → 120 → 150 → 180 → 220, to remove the scratches from the previous grit. Each step should remove the marks left by the coarser one. Skipping more than one grit level almost always shows up as a hazy or uneven surface after staining or painting.
A cloth-backed sheet or a flexible film is best for trim because it can fold and wrap around curves without cracking. Paper backing tends to crease and tear when you fold it into tight corners. For very fine detail work, you might also cut a film-backed sheet into small strips and use them like tiny files, which keeps the abrasive from peeling away.
Cutting standard sheets often leaves uneven edges that can catch on the workpiece or wear out the corners of your sanding block. Custom sheets are die-cut to fit a specific tool or jig, so the abrasive stays flat and lasts longer. They also eliminate the wasted material you get when trimming a 9 x 11 inch sheet down to an odd size for a detail sander or a block plane.
Not always. A higher grit does produce a finer scratch pattern, but the final smoothness depends on using the right sequence and keeping consistent pressure. If you stop at 400 grit but the surface still has deep 120-grit scratches, it won't feel smooth. Also, burnishing the wood by pressing too hard with a fine grit can close the pores and prevent stain from absorbing evenly.
Conclusion
Choosing the right custom sanding sheet starts with matching the grit to your specific task, not just grabbing a familiar number. A lower grit like 40 or 60 aggressively removes material but leaves deep scratches, while a higher grit like 220 or 320 refines the surface for a smooth finish. Many people overlook the fact that the backing material dictates how long the sheet will survive under pressure. Paper backing is cheap and fine for light hand sanding, but it tears quickly on edges or with heavy use. Film backing resists tearing and works well for wet sanding or detailed contours, while cloth backing flexes without cracking, making it ideal for belts or drum sanding on irregular shapes. Custom sizes further change the game—off-the-shelf sheets force you to trim, fold, or waste material, whereas a sheet cut exactly to your block or orbital pad reduces downtime and ensures even wear.
The hidden cost of choosing the wrong grit is more than just a rough finish. Using too coarse a grit on a final coat means hours of rework and extra material, while too fine a grit on raw wood clogs the abrasive and slows the whole job. Paper, film, and cloth each have distinct behavior: paper loads up quickly with softwoods, film sheds dust better and maintains flatness, and cloth tolerates heat from high-speed machines. Before committing to a full batch of custom sheets, test your finish on an offcut or hidden area. Run the exact grit sequence you plan to use—say 80, 120, then 180—and check for swirl marks, uneven scratches, or premature dulling. This small step prevents you from ordering hundreds of sheets that fight your workflow instead of supporting it.
Contact Us
Contact Person: Amanda Wang
Email: [email protected]
Tel/WhatsApp: +86-13602569854
Website: https://www.sunabrasives.com.cn