

China Fish Food Making Machine: Essential Buying Tips for Fish Farmers
2026-09-24
Every fish farmer knows the sinking feeling of watching feed costs eat into profits. The solution? Taking control with your own MINGDE fish food making machine. But with China producing countless models, how do you avoid a costly mistake? This guide cuts through the noise, giving you the essential buying tips that actually matter — so you can invest wisely and watch your fish thrive.
Size the Machine to Your Fish's Mouth, Not Just Your Pond
A common mistake is sizing a pellet mill by pond area or biomass alone. You'll end up with feed particles too large for fingerlings or too fine for market-size fish. Look at the gape width of your smallest stocked fish—not the average. A Nile tilapia fingerling at 2 grams needs a crumble under 0.8 mm, while a 500-gram adult can handle a 3 mm sinking pellet. Getting this wrong means wasted feed, slower growth, and more fines fouling the water.
Catfish, carp, trout, and shrimp all have different mouth shapes and feeding behaviors. Shrimp graze; they don't swallow whole pellets, so you need a crumble or meal that stays intact on the bottom. Trout hit fast and prefer a floating or slow-sinking extruded pellet with some oil. If your machine can't switch dies or adjust cut length easily, you'll be locked into one feed size, and your smallest fish will suffer. Instead of adding another machine, look for one with quick-change die plates and a variable speed cutter.
Before buying, bring a sample of your fish at different growth stages—or at least their mouth measurements—and run test batches. The pellet should be no more than one-third of the fish's mouth width for easy engulfing. If the machine only produces one size, you'll either underfeed the juveniles or overfeed the adults. That mismatch costs more in labor and feed waste than a slightly larger upfront investment in a flexible machine.
Open the Extruder Barrel and Inspect the Screw Before Paying
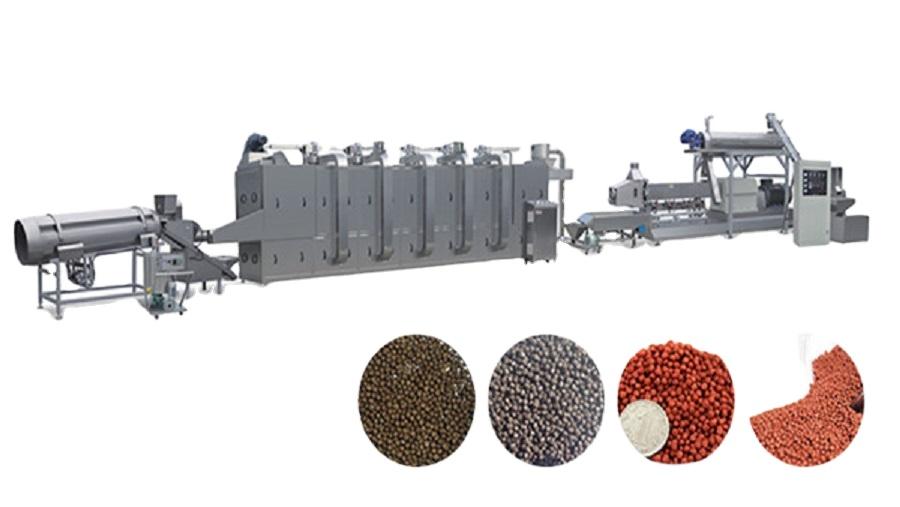
A clean paint job and a brief test run won't show you what's really happening inside the barrel. Ask the seller to open the extruder barrel and pull the screw before any money changes hands. Look at the flight tips—rounded edges, scoring, or signs of metal-to-metal contact mean the screw has been running against the barrel wall. Shine a flashlight down the bore and check for grooves, pitting, or uneven wear. Sellers often wipe down the outside but leave the internal surfaces untouched, which is exactly where the most expensive problems hide.
Bring a set of feeler gauges and a straightedge, and don't be afraid to use them. Compare the screw diameter at several points, especially in the compression and metering zones, where wear concentrates. Look for discolored bands from overheating, or weld repairs that have been ground smooth—these are signs the screw has already failed once and been patched. If you spot a repair, ask for the full history, because a reworked screw rarely lasts as long as the original.
If the seller hesitates to open the barrel or offers excuses about time or seals, treat that as a warning. A legitimate seller confident in the machine will let you inspect the internals. Take photos, note the measurements, and use the actual gap and wear patterns to negotiate. A screw that looks fine but measures 0.5 mm under spec can cost thousands to replace; it's better to find that out before you pay, not after the first production run.
Demand a Wet Mix Test With Your Own Ingredients
Most suppliers will happily show you a wet mix test using their own hand-picked sand, cement, and additives. That demo looks great in a controlled lab, but it tells you almost nothing about how the material will behave with the aggregate sitting in your yard, the local water chemistry, or the specific bagged product you actually ordered. If you want a real answer, insist on a wet mix test that uses your own ingredients from the start.
A reputable manufacturer or distributor should have no problem accommodating this request. It might take a few extra days or come with a small lab fee, but those are minor compared to discovering a slump retention failure or surface finish issue after you have already poured. Ask them to run side-by-side batches: one with their standard reference materials and one with what you pulled from your own stockpile. The difference is often more dramatic than anyone expects.
Do not settle for verbal reassurances or a data sheet that says “performs similarly with most local aggregates.” Bring a five-gallon sample of your actual sand and stone, note the water source, and request written results. The mix that passes beautifully with rounded river gravel can fall apart with your angular crushed rock or high clay content. A true wet mix test with your own ingredients removes the guesswork and puts the responsibility back where it belongs: on the product.
Calculate Energy Costs Per Ton, Not Just Motor Nameplate
The number stamped on a motor's nameplate tells you its rated output under full load, but that's almost never how the motor actually runs. Real-world duty cycles fluctuate, and a 50-horsepower motor might spend most of its day loafing along at 30% capacity or briefly spiking above 80%. If you base your energy budget solely on the nameplate, you're calculating a theoretical maximum that has little to do with what you pay each month. What matters is the work done per unit of material processed, not the size of the iron spinning the shaft.
Consider two identical conveyor systems moving the same tonnage per hour. One uses a 30 kW motor that runs near its sweet spot, while the other has a 75 kW motor that was oversized 'just in case' and never exceeds 40% load. The nameplate comparison would suggest the second system costs more than twice as much to run, but in practice the difference might be negligible or even reversed due to efficiency curves and power factor. Only by measuring kilowatt-hours consumed per ton of product can you see which setup actually drains your wallet faster.
Start by clamping a data logger onto the motor leads for a full production week. Capture active power, apparent power, and runtime, then divide total kilowatt-hours by the tons moved or crushed or mixed during that same period. You'll likely discover that some of your heaviest nameplate motors are surprisingly cheap per ton, while a few smaller units are burning cash because they run constantly at poor efficiency. That per-ton figure gives you a target for improvement: adjust belt tension, swap an oversized motor for a right-sized one, or shift operating hours to off-peak rates. The nameplate got you into the building; the per-ton number gets you out of the dark.
Find the Die and Cutter Wear Points Nobody Mentions
Most people focus on the visible cutting edges and forming surfaces, but wear often starts in places that never get checked. The contact areas on a die mounting plate suffer from fretting corrosion caused by tiny vibrations. These dark spots look harmless, yet they gradually shift the die position and ruin alignment. A quick pass with a fine oilstone on these flat surfaces can restore proper seating before the problem spreads.
Another blind spot is the shank or clamping section of a cutter. Repeated tightening from a collet leaves ring-shaped indentations on the shank. Over time these marks accumulate metal fatigue and lead to runout, even if the cutting edges still look sharp. Measuring shank roundness with a micrometer reveals wear long before the tool starts chattering.
The relief holes or chip channels inside a die also hide uneven wear. As scrap material slides through these passages, it carves irregular grooves that change chip flow direction. The altered flow then scrapes against fresh cut edges and accelerates damage. Inspecting the entrance of these hidden channels with a magnifier and lightly stoning any sharp ridges keeps the whole system working longer.
Get a Written Spare Parts Promise for the First Two Years
When you invest in industrial equipment, the last thing you want is a surprise parts shortage right after the warranty expires. That's why we put our commitment in writing for the first two years: a signed spare parts promise that guarantees availability and priority dispatch. No vague assurances, no fine-print loopholes—just a clear statement that if a critical component fails, we'll have the replacement on its way within 48 hours.
Most suppliers treat spare parts as an afterthought, but your uptime depends on them. With our written promise, you get a documented parts list with agreed lead times for every major assembly, including seals, bearings, and control modules. If we miss a delivery window, we credit your account automatically. This isn't just good customer service—it's a contractual obligation that protects your production schedule from day one.
Ask for a copy of the promise before you sign the purchase order. Read it carefully, check the exclusions, and compare it with what other vendors are willing to put on paper. If they hesitate, that tells you everything. We've been offering this two-year written commitment for over a decade because our parts warehouse is stocked, our supply chain is local, and our reputation is worth more than a short-term sale.
FAQ
Lock down the exact feed type and daily output you need. A tilapia farmer floating pellets at 200 kg per hour has very different requirements from a catfish operation using sinking feed. Giving suppliers a clear pellet size, protein mix, and hourly capacity filters out half the unsuitable machines before you even see a quote.
For most small and mid-size farms, a single-screw machine handles common feed formulas without the extra cost and complexity. Twin-screw units make sense if you plan to run high-fat recipes or switch between many ingredients often, but the price jump is steep and maintenance is more involved.
Ask for a video tour of the production floor and request close-ups of the gearbox, screws, and barrel material. Inquire about the steel grade and heat treatment; if the seller hesitates to name the alloy or send footage of the actual machine being assembled, treat that as a red flag. Also look for third-party inspection reports for similar models.
Freight, port charges, import duties, and the voltage or plug differences often get overlooked. Many machines ship without the motor wired for your local power supply, so you'll need a qualified electrician. Spare parts like dies and blades also add up; order a one-year wear kit with the machine instead of buying piecemeal later.
It can be, but don't assume it does both well. Some machines adjust density through a simple speed or moisture change, but a true dual-purpose extruder needs a more sophisticated control system. Ask for a video demonstration of each feed type using your target ingredients before committing.
Find out which parts wear fastest and whether the supplier keeps them in stock. Ask how quickly they can ship a replacement gearbox or screw after a breakdown. Also request an English manual and a live video call for setup guidance. A cheap machine with no support can idle for weeks over a small seal.
Very important for long-term running costs. A known motor brand may cost a bit more upfront but holds up under continuous use and is easier to source replacements for. Check that the rated power matches your daily output; an undersized motor running near full load all day will burn out sooner than you expect.
Yes, but focus on value rather than just lowering the price. Ask for free spare dies, upgraded control panel, or included shipping insurance instead of a deep discount. Sellers are often more willing to add accessories than cut margin on the machine itself.
Conclusion
Before you wire money to a supplier, step back from glossy brochures and think about what actually happens at feeding time. A machine sized to your pond but not your fish's mouth will keep producing pellets your stock can't swallow, so match die openings to the smallest fish you plan to feed—not just the water volume or the maximum output on the spec sheet. Open the extruder barrel and inspect the screw before paying. Uneven wear, pitting, or a dull finish on the flights often means poor metallurgy or previous rework, and that failure will hit you mid-season when every day counts. Then demand a wet mix test with your own ingredients. If the supplier only wants to run their standard corn-soy demo, push back. Your local soybean meal, rice bran, or cassava will change the texture, expansion, and drying time, and you need to see the real result before accepting the machine.
Running costs hide in plain sight, so calculate energy costs per ton instead of trusting the motor nameplate. Ask for actual kilowatt-hours per ton at your target moisture and die size, then multiply by your local tariff—motors with the same horsepower can differ sharply under load. Also find the die and cutter wear points nobody mentions. These small consumables can lock you into expensive proprietary parts if you don't ask upfront, and slow shipping from China can stop feeding for weeks. Finally, get a written spare parts promise for the first two years, with itemized prices and delivery timelines. A machine without that commitment is a future headache wearing a discount price tag.
Contact Us
Contact Person: LILY SUN
Email: [email protected]
Tel/WhatsApp: 0086-13969103791
Website: https://www.snackfoodmachinery.com/